
Today I’m making a snow globe card and while the die set was designed to make shaker cards – I’m just going to make a dimensional layered Snowy Scene for my Snow Globe!
Supply List
| Cardstocks | Other Supplies |
|---|---|
| Pop Tone Banana Split Pop Tone Gum Drop Green Pop Tone Hot Fudge Brown Pop Tone Snow Cone DCS Pewter Grey Cougar White Smooth Cardstock Shop CutCardStock (affiliate link) | Dies, Stamps, etc. * Ultimate Snow Globe Shaker Die Bundle * Sparkling Snow 3D Embossing Folder The above are all affiliate links |

Let’s Make This Card
Step 1. Cut Your Pieces and Assemble
- Cougar White Smooth Cardstock – A2 Panel, Snowflakes, hilly landscape
- Pop Tone Banana Split – Small scrap that’s about the size of the house
- Pop Tone Gum Drop Green – Landscape with the tree & house
- Pop Tone Hot Fudge Brown – Landscape with the tree & house, deer
- Pop Tone Snow Cone – Snow globe
- DCS Pewter Grey – Snow globe base


For the landscaping pieces, I cut the snow globe circle first and then cut the landscape portion out of it

Step 2. Trim Each Scene Element


Each color will be a different “layer” or scene in my snow globe. So I trimmed the house away from the Pop Tone Gum Drop Green layer and the tree away from the Pop Tone Hot Fudge Brown layer. Behind the house, I used a dotty tape runner to adhere some Pop Tone Banana Split card stock to represent the lights on in the house.
I adhered the snowflakes onto the globe. It helps to hang some of the elements off the edge and trim on the edge. This gives a more organic natural feel to the snowflake background.
Step 3. Start Layering
I used a 3D embossing folder and embossed the Cougar White Smooth Cardstock A2 panel and then trimmed it down to 4″ x 5.25″. I love the look of white layered on top of white. Next I player the snow globe directly onto the embossed panel.


Step 4. Create the Scene
Each of the snow globe scenes then gets layered on but with low profile (~1mm thick) foam. This adds some dimension and depth to the landscape. Since I’m using low profile foam though, it won’t get overly thick. To get the placement exactly where I want, I did trim the edges of each layer.
Don’t worry – that all will get covered by the top-most landscape layer, which was cut out of Cougar White Smooth Cardstock . This last layer requires regular thickness (2-3mm) foam behind the snow globe base because it gets attached directly to the embossed panel. The white landscape layer is adhered flat to the Pop Tone Gum Drop Green layer. This should bring the snow globe base level with top (globe) portion.


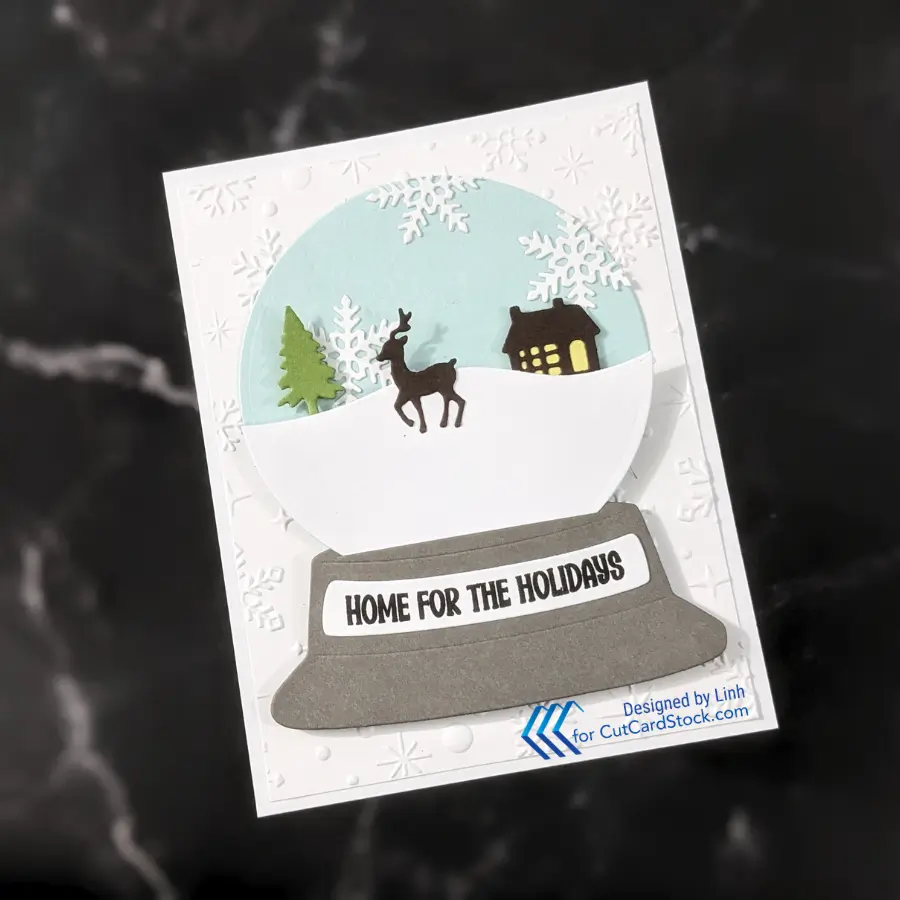
Step 5. Add the Final Touches
The sweet little silhouette deer and a sentiment name plate on the snowglobe will be the final touches on this simple snow globe scene!


I punched a notch on the back of the shadow box to give me a way to grab the interchangeable scene. Then I snipped of everything that’s hanging off or outside the shadow box. The result is a fun shadow box – perfect for any time of day!
Picture Gallery

Enjoy!
