
Mother’s day is coming and this year I even got a head start! Good thing too because I had a few “oopsies” and had to make 2 cards multiple times to get the look I wanted.
Here’s my FLIP tutorial video showing how I made all my cards. It’s super sped up so is a short video even though it shows the entire process for all 5 cards.
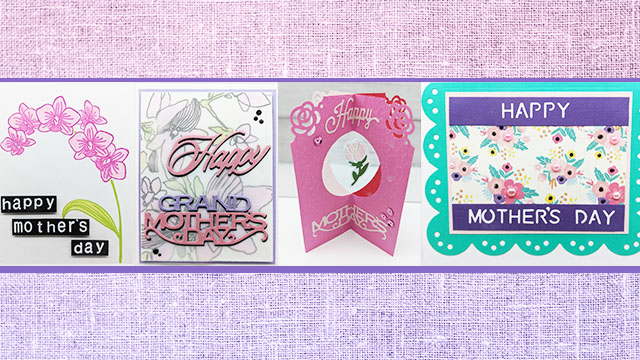
Close-Up
Flat: Gold Emboss w/ Mica Painting

First, I gold embossed the beautiful flowers and leaves from the Altenew stamp set.
Next, just paint in the image using a 1:1 mix of gum arabic to water mixed with mica powder.
TIP – I suggest working in the reverse order from what I showed in the video to avoid dulling the embossing. When I made this card the second time, I stamped the back-most image (in this case the leaves that are blocked by the flowers). I poured embossing powder on but didn’t heat it yet. Then I removed a layer of masks and stamp those images. I did this until I had the stamped and powdered the entire image. Then, I heat embossed the whole image at once.
Shop the Card
Flat: Orchid

TIP: I used die cuts of the flowers to create my floral arrangement before stamping. I simply stamped each of the flower outlines multiple times. (I used colored cardstock just so I could get a more realistic sense for the card I was creating, but you could use scraps.) I think I had 4-5 die cuts of each flower. Using Tombow Removable Adhesive tape runner, I put a little tape on the back of the flowers and laid them down on a card base. Once I had it looking the way I liked, I used this card base to line up my stamp in my stamp positioning tool (similar to the Misti) and
Shop the Card
Layered: Floral

I dropped the Nuvo drops onto some clear acetate. I dropped several different colors so I could place them over the card to see which I liked best. Also, having the drops made ahead of time let me finish the card more quickly and not have to worry about drying time.
There’s so little die-cutting that you just need your little mini – the Prizm or Sidekick!
Shop the Card
Interactive: X-Card
Instead of purchasing the X-card die set, I just designed it myself and cut it out using my Cricut.

If you don’t have a cricut or don’t want to buy the die for the X-card, you can always just die cut a circle in the center of 4 cards.
However, the die set does have a lot of little embellishments that really snazzy up the card — and also can be used in other projects too!
Shop the Card
Pop-Up: 3D Drop-In

I used the One In a Million shadow die (the one that cuts the outline for the pop-up) and cut that out of pattern paper to create a matted layer on the inside of my card.

I did also use a banner die that happened to have a star cut out from the center (so perfect!). I don’t remember where I got it though so it’s not in the shopping list.