
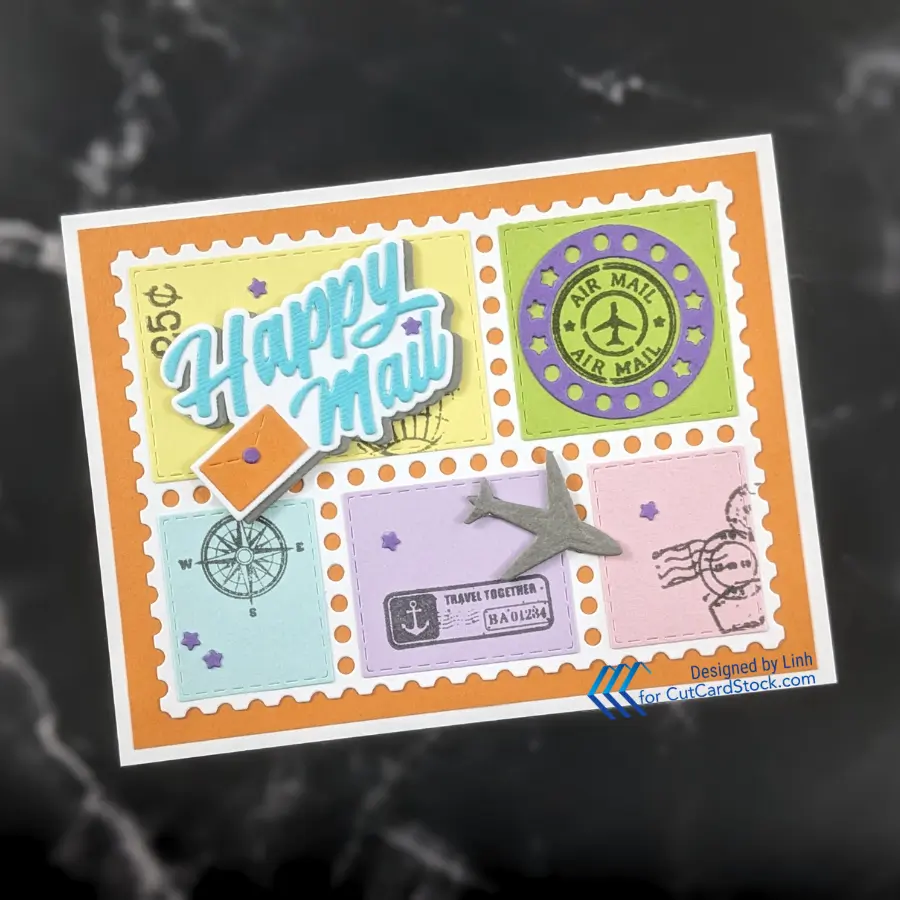
I had a lot of fun making this card. It’s all about the soft pastel rainbow colors and layers. So many layers! I love that this card has some randomness but the solid blocks of color make it still feel somewhat clean and simple.
Supply List
| Cardstocks | Other Supplies |
|---|---|
| Pop Tone Orange Fizz Pop Tone Banana Split Pop Tone Sour Apple Pop Tone Sno Cone Pop Tone Grapesicle Pop Tone Pink Lemonade Pop Tone Grape Jelly DCS Pewter Grey Cougar White Smooth Cardstock Shop CutCardStock (affiliate link) | Dies, Stamps, etc. * EZ Wonder Die #3 * EZ Wonder Die #3 Add-on * Special Delivery Stamp Basic Supplies * VersaFine Claire Morning Mist * Misti Stamping Platform * Die Cutting Machine The above are all affiliate links |

If you like video tutorials, you can watch my tutorial on YouTube.
Let’s Make This Card
Step 1. Cut Your Pieces and Assemble
- Card Base & Postage Grid – Cougar White Smooth Cardstock
- Mat – Pop Tone Orange Fizz
- EZ Wonder Die #3 Add-on: Pop Tone Banana Split, Pop Tone Sour Apple, Pop Tone Sno Cone, Pop Tone Grapesicle, Pop Tone Pink Lemonade
- Postage Cancellation – Pop Tone Grape Jelly
- Happy Mail Shadow, Airplane – DCS Pewter Grey


Step 2. Start Layering Your Panels


I start with a 4″ x 5-1/4″ panel on my card base. The EZ Wonder Die #3 Add-on cuts perfect layers that go on top of the Postage Grid from the EZ Wonder Die #3. I like this pastel rainbow – it’s so soft and light.
These solid blocks of color are made more interesting because of the layers. The framing and postage border shape make give it a lot of simple and clean detail.
Step 3. Random Stamping
Next, I stamped fun postage-themed marks onto each of the grid panels. The more random, the more fun. Try not to overthink it too much. You can go with something totally wonky or something more straight, but the eclectic mix of stamps is what makes it unique and fun no matter what you do!

Step 4. Assemble Sentiment
The “Happy Mail” sentiment has some more fun layers! I used the star and dot that dropped out of the postage cancellation die cut to give it some more fun detail that perfectly coordinates. I used low profile foam to add a bit more dimension to this card.

Step 5. Add Additional Die Cuts
For a final touch, I added additional die cuts – even the stars that fell out of the postage cancellation die cut were used in lieu of embellishments.

Picture Gallery

Enjoy!

One of my favorite cards I’ve seen you make! The colors are perfect together. Reminds me of sherbet cones 😎
OMG! Thank you! I do love the colors too…a bit of a departure from my usual teal. Lol 🤣
Can’t believe I’ve never made a spinner card in three years that I’ve been doing this. I even bought brads at Office Depot when I first started because I thought those cards were so cool. 😎 I’m gonna try yours thank you!!
Yay! Glad you’re gonna make one. I think it was probably just as long for me too. They are fun and easy to make.