
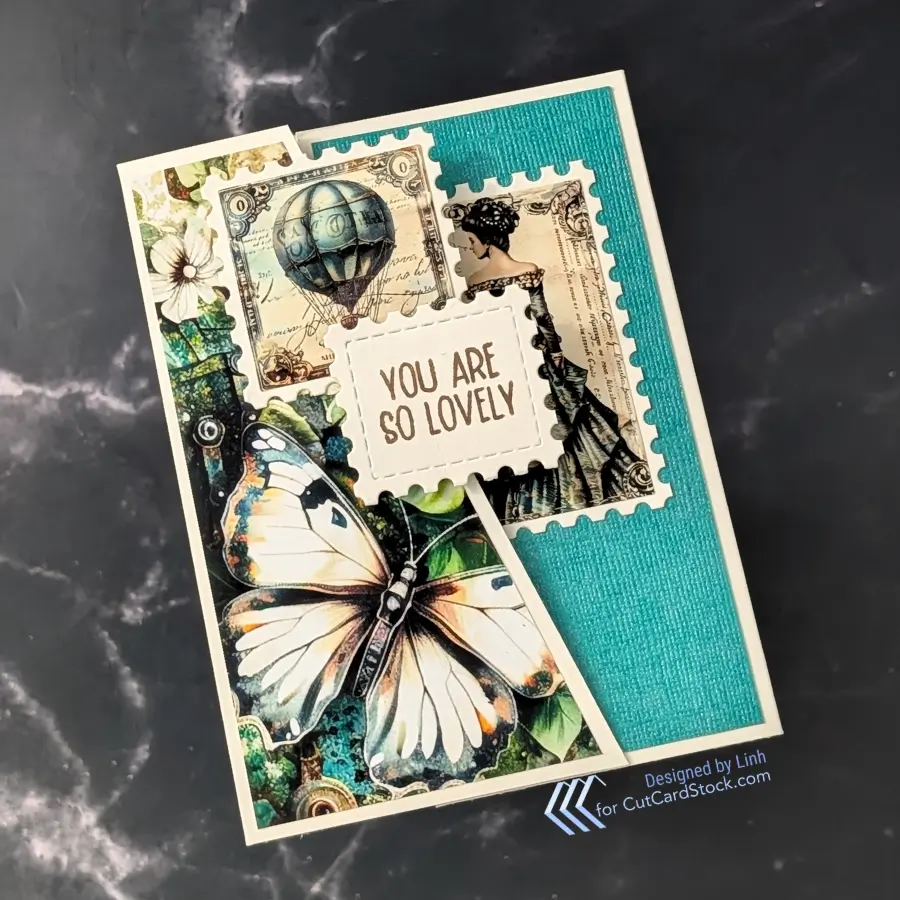
I love creating easy-to-follow recipes for how to make fun cards without the stress of measuring or following anything precisely. The idea is to create intuitively and just “wing it” every time. Today I’m sharing a “fancy” gate fold. It’s a way to elevate your traditional gate fold to make it different and unique.
Supply List
| Cardstocks | Other Supplies |
|---|---|
| DCS Textured Pearl Hummingbird Teal Natural White Shop CutCardStock (affiliate link) | * EZ Wonder Die #3 * EZ Postage Printable: Streampunk Gears * Paper Trimmer * Bearly Art Glue – 10% off with code LVHANDCRAFTED * TapeRunner 20% off with code LINHVAN The above are all affiliate links |

Let’s Make This Card
Step 1. Create Your Card Base – 11″ x 5.5″
With the 11″ edge at the top of your scoreboard, you want to score 2 lines to create your 2 gates. The exact placement of the score lines doesn’t have to be exact. There are only a couple rules:
- 4.25″ should be between the two score lines
- The two “gates” should be less than 4.25″ wide. You can really play with this and have some fun!
My score lines were at: 2.75″ and 7″. That gave me a left gate that’s 4″ wide and a right gate that’s 2.75″ wide.


Step 2. Cut An Angle Into Your Gate
A standard gate fold card has the left and right gates meet exactly in the middle. Sometimes I’ve seen them meet up a little bit off-center, but generally they meet up with each other somewhere. With my “fancy” gate fold, the gates are meant to overlap to create some asymmetry. The way I achieve this is to cut an angle into the gate.
For this card, I leave the right gate as is. Then I cut a random diagonal edge on the left gate.

Step 3. Start Layering
I aimed for 1/8″ border of the card base showing around my pattern paper and mats and layers. The DCS Textured Pearl Hummingbird Teal on the right gate is 2.5″ x 5.25″.
For the left gate, because I cut a random angle, I need to cut my pattern paper to fit. I first cut the pattern paper to 5.25″ tall. Line up your pattern paper, so it has the border you want to see along the 3 straight edges. Then, with a pencil mark your pattern paper where you need to cut it so you have that same border along the diagonal edge.


Step 4. Collage Across the Gate
With any shape dies you have, create a fun collage across the gate! This creates a fun, fancy edge on your gate that makes it a little different. What I love is because it overlaps with the right gate, you can decide that some of your collage elements are adhered to the right gate and some are adhered to the left gate.


Picture Gallery


Enjoy!
