
I have a fun series on my YT Channel where I give you a recipe for how to create a style of card using whatever you have in your stash! With minimal supplies and a fun technique, you’ll be able to use and adapt this recipe to create amazing cards! Recipe #3 is one that I plan to use to help me create clean and simple cards. It is a common design guideline of the Rule of Thirds. In this context, I’m confining all of my design elements to 1/3 of the my card, leaving 2/3 of the card white — just plain ol’ card base!
Supply List
| Cardstocks | Recipe #3: Rule of Thirds |
|---|---|
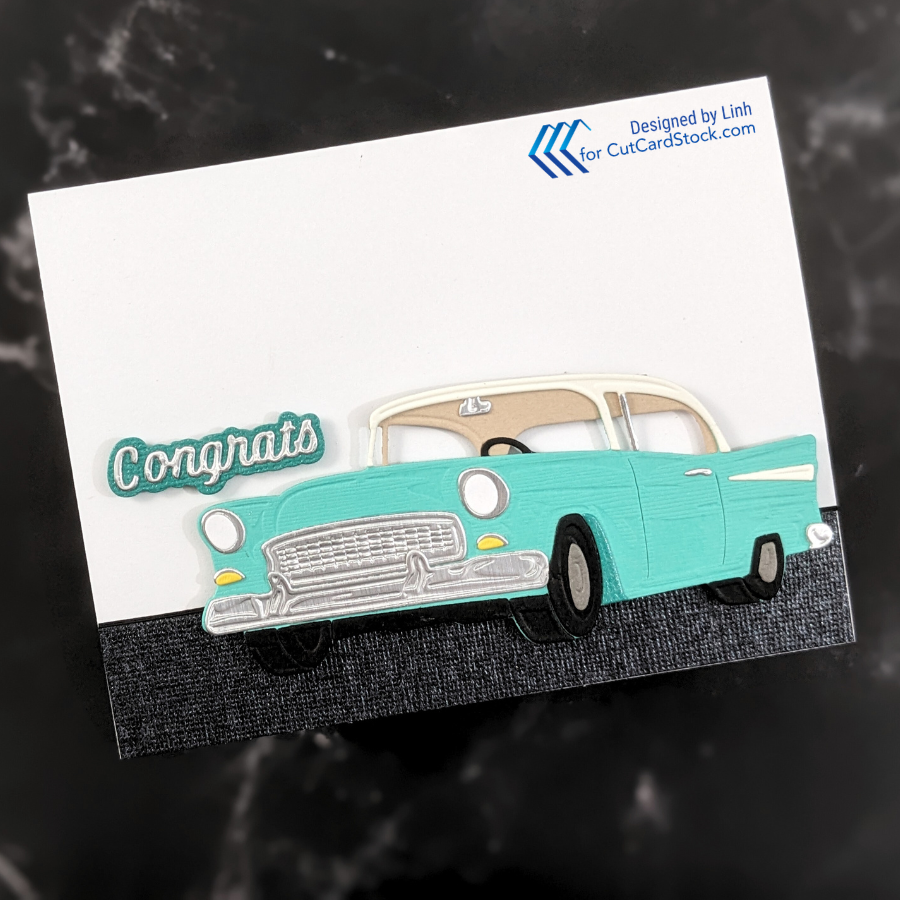
| DCS – Textured Pearl Hummingbird Teal DCS – Textured Pearl Gunmetal DCS – Textured Caribbean Blue DCS – Textured Yellow Jacket DCS – Pewter Grey DCS – Natural White DSC – Sand Castle Pop Tone Black Licorice Cougar White Smooth Cardstock | What You’ll Need: * Card Base * Background that’s less than 1/3 of your card * Focal image * Sentiment * Classic Road Legends Collection |

Watch a video tutorial here – https://youtu.be/pc0um2eRlNY
Let’s Make This Card
Step 1. Cut Your Pieces and Assemble Your Spaceship
- Shadow layer of congrats: DCS – Textured Pearl Hummingbird Teal
- Strip at the bottom: DCS – Textured Pearl Gunmetal
- Car base: DCS – Textured Caribbean Blue
- Lower lights: DCS – Textured Yellow Jacket
- Wheel cover: DCS – Pewter Grey
- Top of car & accent stripe: DCS – Natural White
- Inside liner of the top of car: DSC – Sand Castle
- Wheels & Steering Wheel: Pop Tone Black Licorice
- Headlights: Cougar White Smooth Cardstock
- A2 Card base: Cougar White Smooth Cardstock


💡TIP: If you have adhesive sheets, you can apply your adhesive sheet to your cardstock and then die cut to create stickers out of these pieces!
Step 2. Create a Background

You can make a background using anything – stenciling, embossing your panel, etc. You’ll want to restrict yourself to less than 1/3 of your card base. I used a strip of the DCS – Textured Pearl Gunmetal to create a “street” to ground my car.
Step 3. Add Your Focal Image
Since this card is so simple, adding a bit of dimension can help literally elevate the card.


Step 4. Add Your Sentiment
I tried to preserve as much white space as possible but the only spot that really fit my sentiment was this one. I think my card started around 1/3 and ended up closer to 1/2, but it’s still pretty clean and simple!

Picture Gallery

Enjoy!
