
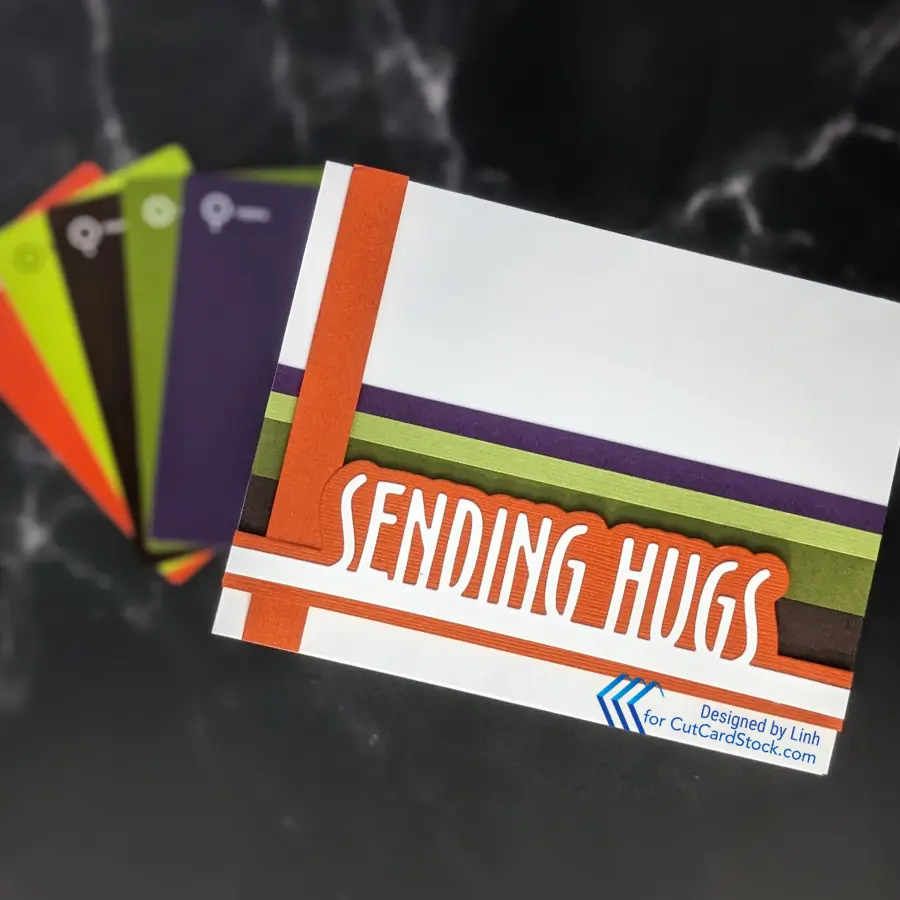
Today, let’s make our solid color cardstock the star of the card! I have a really easy recipe for clean and simple cards that celebrate color. All you have to do is cut strips of solid color cardstock in various colors and create a pattern that’s pleasant to your eyes. Add a sentiment and you’re done! It really is that easy!
Supply List
| Cardstocks | Other Supplies |
|---|---|
| DSC Flame Tree Orange Pop Tone Jelly Bean Green DCS Galax Pop Tone Hot Fudge DCS Plum Cougar White Shop CutCardStock (affiliate link) | Dies, Stamps, etc. * Zollie Palette Scout * Zollie Palette Scout Toolkit (Releasing Sept 25) The above are all affiliate links |

Watch me make this on YouTube.
Let’s Make This Card
Step 1. Choose Your Colors
There are a lot of places to find color palettes. You can look for inspiration from nature, art, pattern papers or tools like the Color Cube or my favorite – the Zollie Palette Scout. I created my palette around the DSC Flame Tree Orange cardstock I just got in my latest order.
Once I created my color palette, I looked for cardstocks to match. I didn’t quite have a good match for the “Flame 2*” card, so I actually found a darker color – “Flame 1”, which was a great match with Pop Tone Hot Fudge. Sometimes if you can’t find the supplies to match your color palette, change your color palette to match your supplies!


Step 2. Cut Your Cardstock
- 1/8″, 1/4″, 1/2″ Strips of:
- Accent Color of your Choice – Sentiment Bubble
- Cougar White – 8.5″ x 5.5″ Card base and sentiment


Previously, when I’ve crafted with strips, I’ve cut all the strips to the same width. This time I thought it would be fun to actually use different widths. This way I can play with creating different balances between the colors.
Step 3. Create Your Card Base
To create a card base, cut a sheet of Cougar White to 5.5″ tall by 8.5″ wide. Along the 8.5″ edge, score in half at 4.25″.
Step 4. Pick an Accent Color

One color should be the “star” of the card. In this case, I think the DCS Plum is the most “out of left park” color for me. I see orange and green combinations a lot – particularly in the fall with pumpkins. But the purple in the mix is not one I would have gravitated to on my own, so I’m going to embrace it and make it the star of my card by accenting my sentiment with a bubble layer in this color.
Step 5. Create a Pattern with the Strips

Now the fun part! The beauty of just using strips of card is that the pattern you create becomes the focus of your card. Instead of just looking at solid color cardstock as just a mat layer, it’s fun to make it the focal point sometimes. So I like to just “audition” different patterns by just moving them around and seeing how I like it.
It’s nice to have the different widths of strips and amazing how it’s possible to change the dynamic or feel of a card just by your choice of how much or how little of a color to use.
Step 6. Adhere Your Strips and Sentiment


Next, just glue down your strips and your sentiment onto your card! I like to keep this particular layout to the bottom third of my card, leaving a lot of white space.
💡 Pro Tip: Line up all your strips in the order you want to see them and tape them together on the back with washi tape. This makes it easier for you to glue the entire, assembled piece as a single unit.
Picture Gallery


Enjoy!

AGHHH!!! Now THIS is a Project even I can do with what Very Limited Supplies I currently have! Thank You for the reminder that you Really Don’t HAVE to have ALL The Supplies & The Newly Released Paper Collections to create something Beautiful!!! ~🙏💙🙏~
Thank you so much, Erica! I’m so glad you like it! 💖