
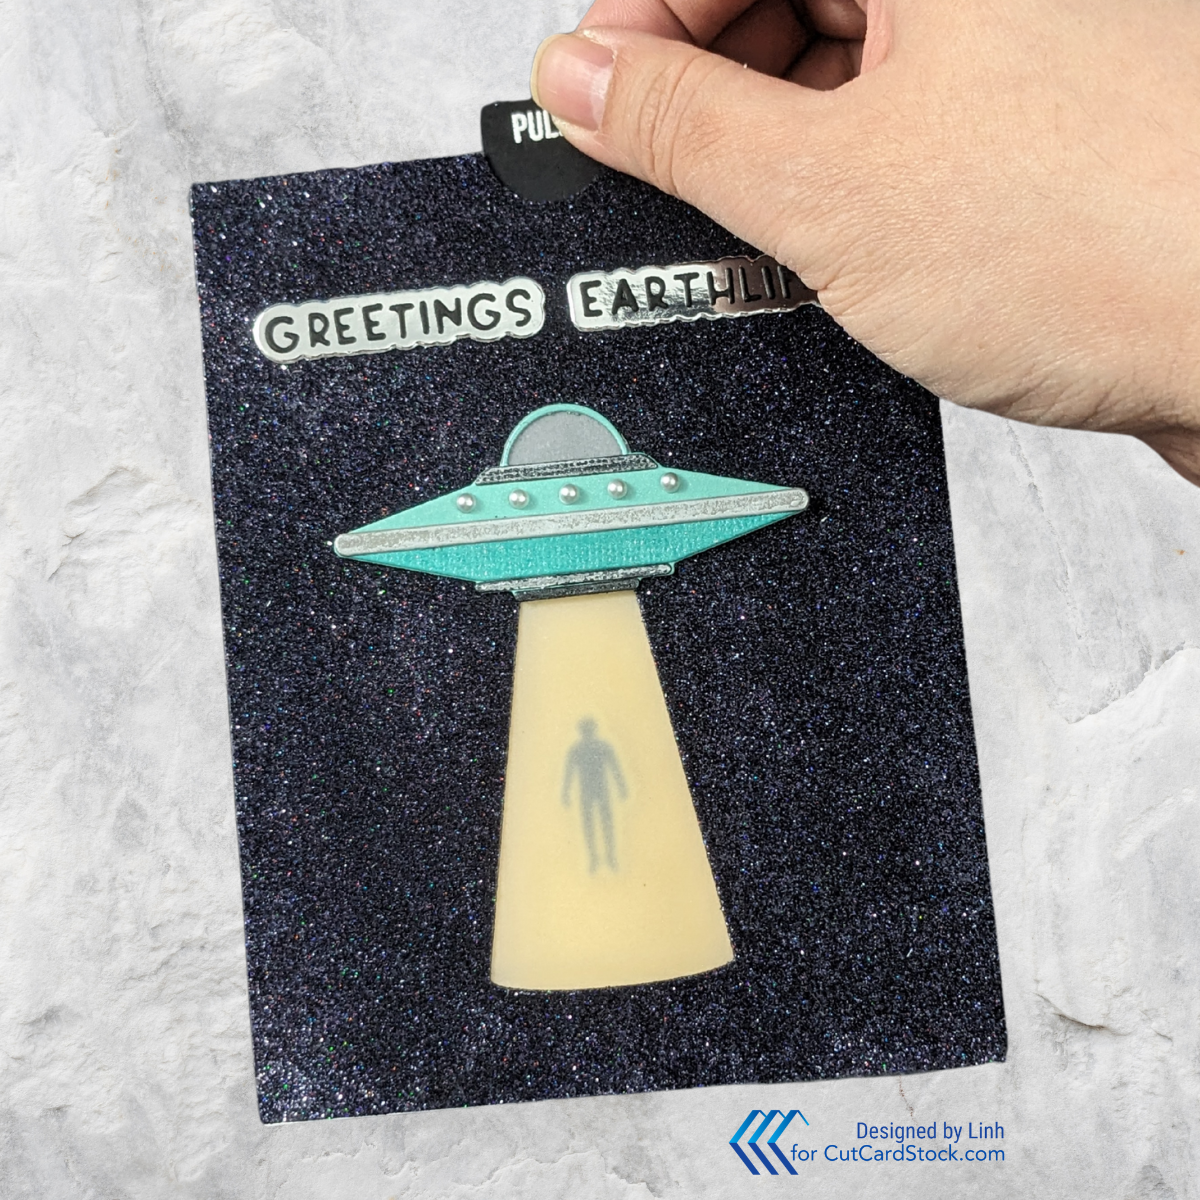
If you’re looking to add a bit of extraterrestrial fun to your handmade card collection, this interactive UFO slider card is sure to wow! The scene features a mysterious flying saucer hovering in a glittery night sky. But the real magic happens when you pull the slider tab—suddenly, a tiny figure begins to rise up, being “abducted” by the UFO! It’s a playful twist on interactive paper crafting that’s both surprising and delightful.
Supply List
| Cardstocks | Other Products |
|---|---|
| DCS – Textured Pearl Hummingbird Teal DCS – Textured Textured Caribbean Blue DCS – Textured Pearl Gunmetal DCS – Textured Yellow Jacket DCS – Pewter Grey Pop Tone Black Licorice Cougar White Smooth Cardstock | Trinity Stamps Tiny UFO Trinity Stamps Abducted Sizzix Lustre Wax Laser Black Glitter Vellum Acetate |

Watch a video tutorial here – https://youtu.be/pc0um2eRlNY
Let’s Make This Card
Step 1. Cut Your Pieces and Assemble Your Spaceship
- Bottom part of the UFO: DCS – Textured Pearl Hummingbird Teal
- Top part of the UFO: DCS – Textured Textured Caribbean Blue
- Top and bottom accents of the UFO: DCS – Textured Pearl Gunmetal
- Middle accent of the UFO: DCS – Pewter Grey
- Light: DCS – Textured Yellow Jacket
- A2 Panel: Pop Tone Black Licorice
- A2 Card base: Cougar White Smooth Cardstock
- Vellum to cover the light beam

💡TIP: If you have adhesive sheets, you can apply your adhesive sheet to your cardstock and then die cut to create stickers out of these pieces!
Step 2. Make a Glitter Galaxy!
I placed the black cardstock panel onto a double-sided adhesive sheet and peeled off the liner paper to reveal the adhesive. Pour a GENEROUS amount of glitter over the panel and rub it into the adhesive firmly. Make sure you’re doing this over a scrap piece of paper so you can collect the excess glitter and pour it back into the container.


Step 3. Prepare to Teleport
Line up the UFO and light beam die on your galaxy glitter panel. Cut your panel with the light beam die. I also stamped and die cut out various beings to be teleported. I ended up going with the human. To make it look more seamless in the light beam, I found a marker that’s close to the yellow I’ll be using for the light and I colored the white outline of the human. I also glued a piece of vellum behind the aperture to soften the “light” of the beam.


Step 4. Create The Slider Mechanism
Cut a slot through some white (or scrap) cardstock. I cut this to fit so it will be completely hidden above the light beam aperture that was cut.


Cut 4 circles that are about 1/2″ in diameter. Fold two of them in half. Glue those two to a third (full circle). When you glue them down, you should only be gluing half of each of the folded circles. Slip the halves that aren’t glued down through the slot of your slider mechanism. Open the half flat and glue the 4 circle on top. This should lock the stacked circles into the slider mechanism, but you should still be able to slide the disk up and down the slot.


Step 5. Add Your Pull Tab
Cut some cardstock about 1″ wide and about 4″ high (you’ll trim the height down to fit later. If your cardstock isn’t thick, you can double it up like I did so it feel sturdy. Add foam adhesive to the left and right edge of the slider mechanism. Make sure there’s enough room for your slider mechanism in the middle. Add liquid adhesive to the slider disc and glue your pull tab to it.
TIP: Once you position the mechanism on your card base, you can trip the pull tab to the exact height you need for it to be flush to the top of the card.


Step 6. Attach Your Acetate
Attach your human to the acetate and make sure he is position where you want him in the beam of light.
On the opposite side of your slider mechanism, add foam adhesive to the far left and far right. Make sure there’s enough space in the middle for your acetate. Using a strong adhesive, adhere your vellum to the slider disc.

Step 7. Attach the Slider to the Card Front
You can now add foam adhesive to the rest of this panel. You will need to double up on your foam because the slider mechanism has 2 layers of foam (one layer on each side of the mechanism). I like to add some liquid adhesive to glue this down so it’s nice and permanent.


Make sure to add your yellow cardstock where the light beam aperture is.
Step 8. Attach the Spaceship and Sentiment
With the panel now attached to the cardbase, all that’s left is to decorate! Add your UFO and sentiment!


Step 9. Make Sure It Works!


Picture Gallery

Enjoy!
