
SUPPLIES
- EZ Postage Printable: Vintage Christmas Bundle
- EZ Wonder Die #3 – https://lvhandcrafted.com/EZ3
- EZ Wonder Die #3 Add-on – https://lvhandcrafted.com/EZ3Addon
- Solid Color Cardstock – http://shrsl.com/4vhjq
- Adhesive – http://shrsl.com/4vhjr
- Paper Cutter / Trimmer – http://shrsl.com/4vhjs
- Die Cutting Machine – http://shrsl.com/4vhju
- Color Printer – https://amzn.to/4i0xJEw
- Premium Presentation Matte Printer Paper – https://amzn.to/42jOhlc
STEPS
CARD 1
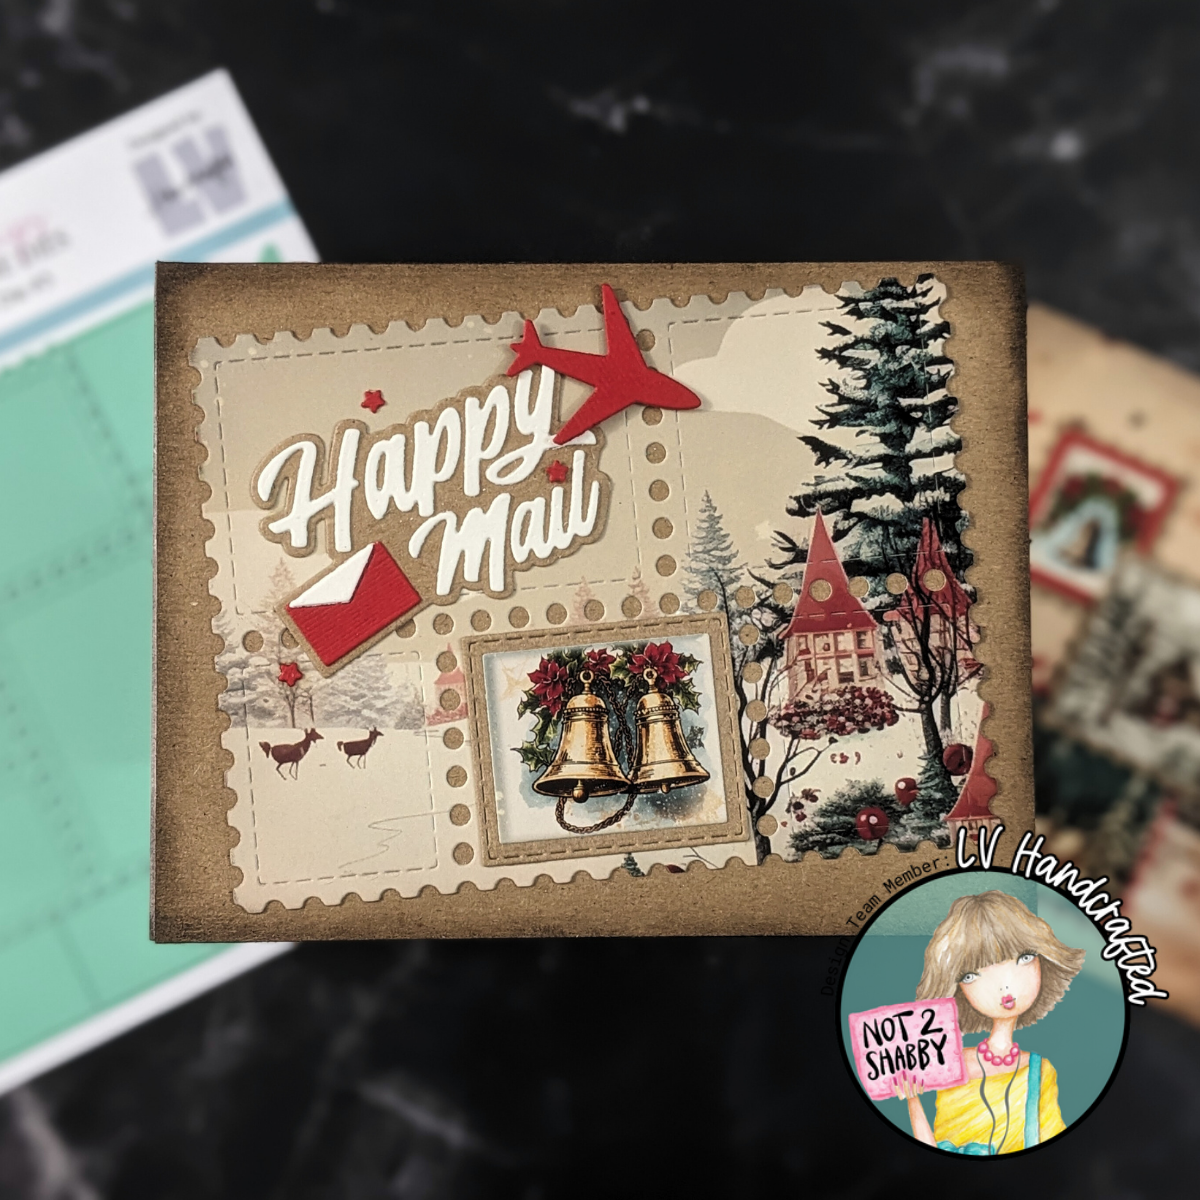
1) Create your card base. Cut white card stock to 8.5″ x 5.5″. Score and fold along the 8.5″ edge at 4.25″
2) Use EZ Wonder Die #3 to cut the 6×6 pattern paper portion of the printable
3) Use the EZ Wonder Die #3 Add-on to cut out the additional 10 stamp images remaining on the printable.
4) Use the EZ Wonder Die #3 Add-on to cut out the “Happy Mail” Sentiment and assemble the layered pieces.
5) Use the EZ Wonder Die #3 Add-on to cut from Kraft and/or coordinating solid cardstock The plane, the postage cancellation, and additional mats for the small stamps.
6) Glue the postage collage from Step 2 to the 4-1/4″ x 5-1/2″ Kraft color panel.
7) Ink of the edges with a dark brown ink to make it vintage.
8) Glue a stamp from Step 2 with a solid color cardstock layer from Step 5 to the postage collage.
9) Glue the Happy Mail sentiment from Step 4 and additional elements from Step 5 to decorate.
CARD 2
1) Cut from a 2nd printable page a 4-1/4″ x 5-1/2″ panel from the pattern paper.
2) Cut EZ Wonder Die #3 from plain Kraft Color Cardstock
3) Cut the collage to separate out the individual stamps.
4) Layer the the stamp images with mats from EZ Wonder Die #3 Add-on to create the look that you like for 3 stamps.
5) Collage those three individual stamps in a fun pattern on your card front.
6) Add additional elements from the EZ Wonder Die #3 Add-on like the postage cancellation die.
7) Add a sentiment and any additional embellishments.