
Hi friends! Today I’m sharing a fun card you can make to celebrate any occasion or no occasion at all. I made this for a good friend whom I cherish.
Supply List
| Cardstocks | Other Supplies |
|

For video instruction, you can watch this tutorial.
Let’s Make This Card
Step 1. Die Cut the toaster & toast
- Toaster Base: DCS – Textured Pearl Hummingbird Teal, Pop Tone Black Licorice (2 ct)
- Toaster Front: DCS – Textured Caribbean Blue
- Toaster Bottom: DCS – Textured Pearl Gunmetal
- Toaster Dial: DSC – Pewter Grey
- Toaster Knob: Textured Pearl Gunmetal, Cougar White Smooth Cardstock (2 ct)
- Toaster Lever: Textured Pearl Gunmetal (2 ct)
- Toaster Lights: DSC – Habenaro Red, DCS – Textured Yellow Jacket, DCS – Bonsai Green, Vellum (3 ct, optional)
- Toast Base (crust): DSC – Sand Castle
- Toast (middle): DCS – Natural White (2 ct)

Step 2. Prepare & Assemble the Pieces
Toast – Ink the edges of all the toast pieces with your favorite brown/tan inks. I love VersaMagic Ink. Glue one Toast (middle) to each side of the Toast Base. Stamp a sentiment onto the front of the toast. You can leave the back blank for a place to write a personal message or stamp a second sentiment on the back.

Toaster Dial/Knob – Glue together 3 pieces of the Toaster knob with the DCS – Textured Pearl Gunmetal on top. Glue this stack of knobs to the Toaster Dial (Pewter Grey).
Lights – If you cut the Toaster Lights out of vellum, glue a vellum layer onto each of the 3 lights (Habenaro Red, Yellow Jacket, Bonsai Green). Add Diamond Glaze (or Glossy Accent) to this circle die-cut to give it a domed, glossy shine. Set these aside to dry. They will be the last thing to go onto the card.

Toaster – Glue 2 pieces of the Toaster Base together – DCS – Textured Pearl Hummingbird Teal (top) and Pop Tone Black Licorice (Back). NOTE: You should have a 3rd Toaster Base that we’ll use later. Glue the Toaster Front, Toaster Dial/Knob and Toaster Bottom to the Toaster Base.
Toaster Base (Back) – There are lots of options for the back of your toaster. You can leave it blank. You can cut another smaller “Toaster Front” piece out of white and have that be a space to write a personal message. Or you can do what I did, I die cut the word “Friends” out of Cougar White Smooth Cardstock and stamped a sub-sentiment with VersaMark ink and white heat embossed it.

Step 3. Cut your slider mechanism pieces
All of the pieces below can be cut from Cougar White Smooth Cardstock. Everything but the Slider discs should be 80# cover or heavier weight. The Slider discs should be no more than 80# cover. If you don’t have heavyweight cardstock, you can glue two layers of 80# cover cardstock.
- Slider track – 2-3/4″ x 2-3/4″
- Slider discs – 3/4″ circles (4 ct)
- Pull Tab – 4″ W x 3/4″ H (the length will be trimmed to fit later)
Step 4. Assemble Slider Mechanism
Cut a 1/8″ wide slit in the middle of the Slider Track. It should start and stop roughly 1/4″ from the top & bottom edges.

Fold two of the Slider discs in half. Glue these two pieces to one full circle. You should have three Slider discs glued together a full circle with two halves that stick out like legs.

Pinch those two legs together and slide through the slider track you cut. Glue the fourth Slider disk to the flattened legs.

Glue a Toaster Lever piece to one end of your Pull Tab. Trim your pull tab to match the shape of the Lever. Then glue the second Toaster Lever piece to the back of the Pull Tab.

Step 5. putting it all together!
Apply glue to one of the Slider disc. Attach you Toast to it. Add a strip of Bearly Art Cubies (or your favorite dimensional foam) to the bottom of the Slider Track. Glue this piece to the back of your Toaster Base so that the Toast is centered. The Toast should slip through the slit of the Toaster.

Apply Bearly Art Cubies to the back of the Toaster and to the Slider Track. You need to make sure to only place foam surrounding the Pull Tab (not shown) and the path the Pull Tab needs to travel (i.e. up and down the slider track). When you are applying foam on the Toaster Base, you will need to place stack two pieces of foam on top of each other. When you are applying foam onto the Slider Track, you only need to place one layer of foam.
(Optional: To help stabilize the Pull Tab, you can add 1 layer of foam to the Toaster Base under where your Pull Tab will go (on the left side of the photo shown below). Be careful NOT to remove the liner on this foam. It is just there to support your Pull Tab from underneath.)

Measure and cut your Pull Tab to fit and glue to the Slider disc that’s visible.


Step 6. Finishing Touch
The Toaster Lights should now be dry, so you can now adhere them to the front of your Toaster as the final finishing touch!
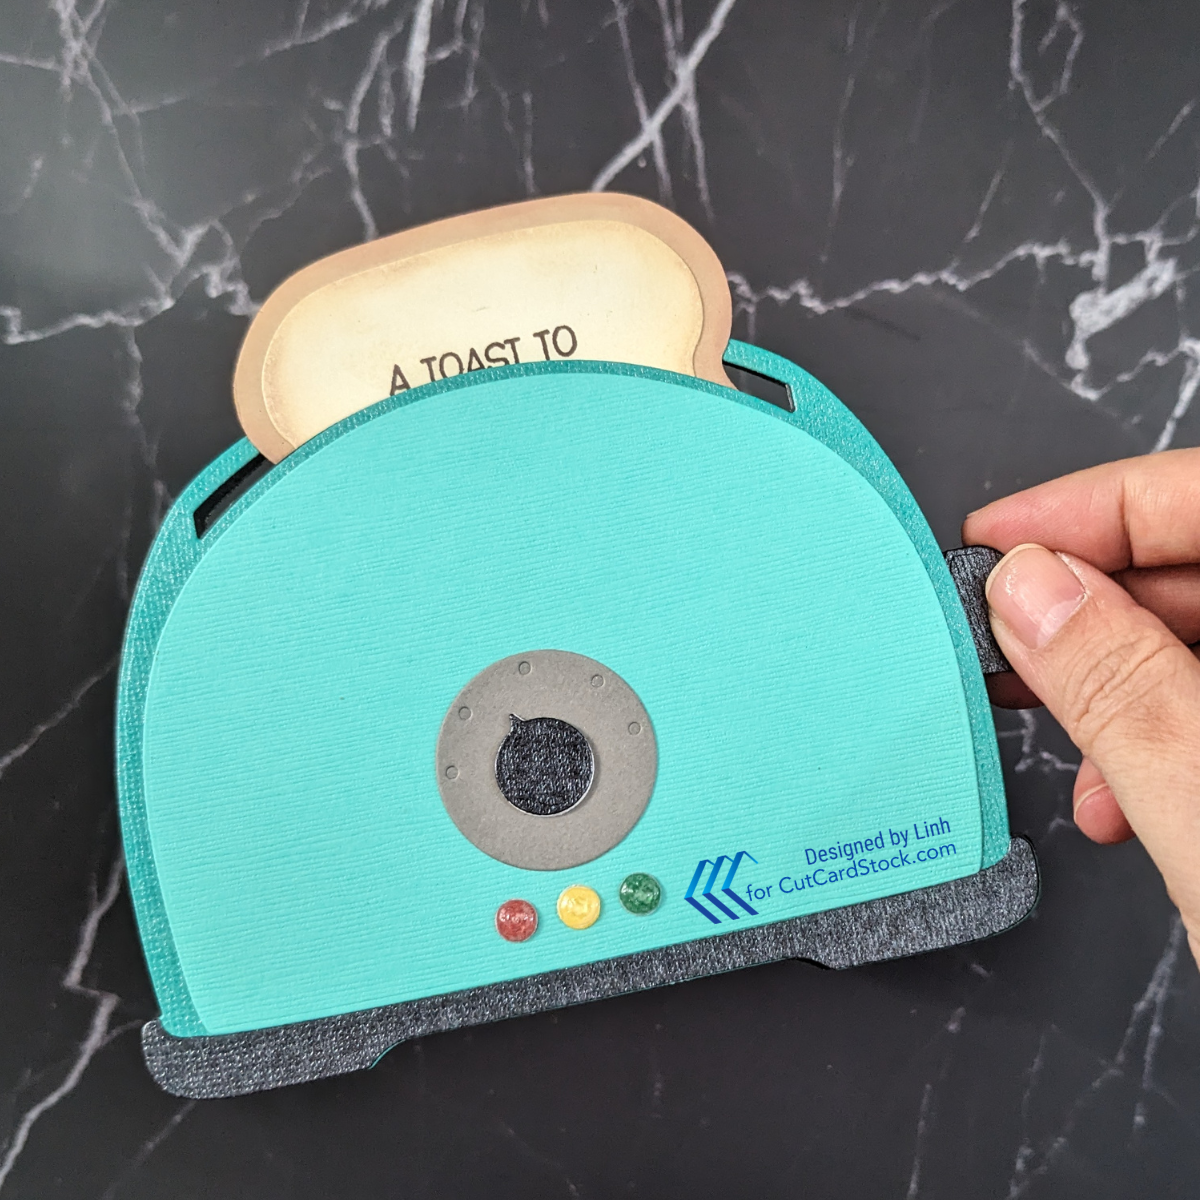
This fun slider mechanism works in two ways – you can pull the Toast up to review the sentiment. Because the Toaster Lever is attached to a Pull Tab that is also connected to the slider mechanism, it will go up and down with the Toast. That means the second way to interactive with this card is to use the Toaster Lever to move the Toast up and down!

Picture Gallery


Enjoy!
