
If you want to invest in making all your greeting card, this post is for you! (If you haven’t made any cards yet, check out my post on how to Start Making Handmade Cards for under $10.) I’ll give you recommendations for handmade card supplies you may want to invest in and why. Even if you don’t plan to mass-produce cards in the hundreds, these supplies are we well-worth the investment for the dozens of birthday cards and holiday cards you need throughout the year.
Cardstock
I use a variety of white cardstock for both card bases and layering panels. I mainly buy white because I can always ink it up to be whatever color I need. However, I’ve recently started adding kraft, black, ivory and grey in smaller quantities.
There are a few paper weights you want to consider:
- 100-120 lb cover (270-325 gsm) – I use this for all my card bases. You want your card base to be sturdy. It makes a card feel luxurious, and you sometimes need that sturdiness when you’re doing different cuts, folds or cutouts.
- 80 lb cover (216 gsm) – This is the most used paper weight I have. It can be used for layering but it can also be used as a card base if you’re adding many layers and don’t want the extra bulk.
- 60-70 lb cover (160-190 gsm) – This is good if you’re adding multiple layers to a single card.
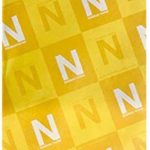
If you watch other card makers on YouTube, you’ll hear them mention Neenah Solar White cardstock a lot. It can be expensive (for my budget anyhow). My recommendation is if you are layering, buy the cheaper 80 lb cover Neenah Cardstock. It’s better as a finishing layer if you’re inking or stamping on it. You can use any brand heavyweight cardstock for your base if it’s just going to get covered up.
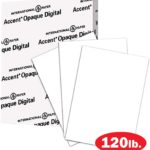
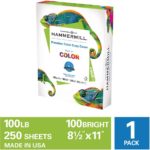
Personally, I really like the Hammermill color copy cardstock. It’s super smooth and very white. I’d say it’s on par with Neenah but much more cost effective. The other brand I use a lot is Accent Opaque. I use their 120 lb cover for my card base especially if it’s just going to get covered up. I use their 65 lb cover or 80 lb cover for layering panels. It does have more “tooth” if you need that.
I admit I’m a frugal crafter (it’s just a hobby and not a career afterall), but being frugal doesn’t mean always going with the cheapest. I try to be smart about where I spend my money. Since paper is the biggest consumable in card making, I go through a lot of it. I like reserving my Neenah paper for when I’m inking an entire scene that’s going to be a major design element of the card. It’s best to use the paper that takes coloring (e.g. alcohol markers, ink, etc.) really well if it’s going to the focal point of your card.
And of course, envelopes! While not strictly “cardstock”, I include it here since it is a paper product. I generally make A2 sized cards (4.25″ x 5.5″ folded), so these envelopes work great for that. Whatever size envelop you need, I highly recommend getting the peel-and-stick variety (most are these days). If you send a lot of cards, it’s nice not to have to lick the envelope.
Paper Trimmer
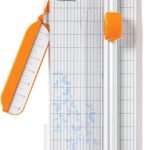
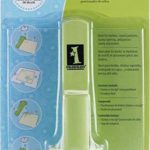
The first tool I consider a must-have is a paper trimmer. There are two main styles – rotary and guillotine. There are pros and cons to both, but I use a rotary trimmer similar to the one shown. (I actually have one model down from it. But I may jump a couple models up so I can cut multiple sheets at a time.) The one I have has a scoring blade (sold separately) that enables you to use this to score your paper for cleaner folds. So this is essentially a three-in-one tool! It gets used for every single card I make, so you should definitely find one that’s the best quality you can afford.
A paper trimmer saves you time because there’s a ruler and cutting blade built into one device so you can cut cardstock down to size very easily. The end result will yield a cleaner and straighter cut than using scissors. Perhaps most important is it saves your hands from cramps and fatigue that can result from using scissors or a craft knife for too long.
Adhesive
I stock a variety of adhesives so I can be sure what I attach to my card stays put. It’s important to use the right adhesive for the job so you aren’t wasting expensive tape where you don’t need or using adhesive that isn’t strong enough to secure your elements.
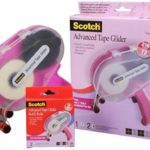
The first adhesive is a tape runner. I use Scotch’s ATG gun. I’ll be honest, I didn’t initially invest in one of these and instead bought smaller, handheld tape runners and refills. They are convenient – especially if you craft on the go. However, I worked out the math and ATG gun tape is a lot cheaper than those refill packs. Also, it comes in larger rolls, so you run out less frequently. I don’t mass produce hundreds of cards, but I was still going through the handheld tape runner refills really quickly.
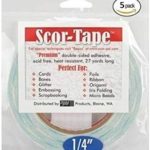
Scor-Tape is another must-have. It’s a dry adhesive tape similar to what comes out of an ATG gun, but it comes on a roll. It has a paper release backing, so you can easily tear it down to the length you need. I typically use this when I need a stronger bond or I’m taping together different types of materials (e.g. cardstock and acetate). It comes in multiple widths from 1/8″ up to even 6″.
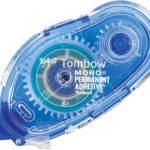
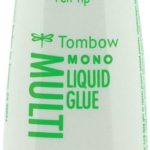
Liquid adhesive is a must as well. Tombow’s Mono Permanent Multi-Purpose glue is great. It’s a strong adhesive but it also dries tacky if you want a less permanent bond or want to try other techniques like foiling!
Finally, I use foam adhesive to add dimension and create shaker cards. When I sat down to do the math to compare the cost of adhesives, foam tape is actually the most expensive. That’s not surprising since it’s more than just the glue – you’ve got foam sandwiched between two strips of glue.
I’m experimenting with a cost-saving alternative because I want to use it more generously than I have been. If I find a solution worth sharing, I’ll be sure to post about it.
I consider the handmade card supplies above must haves. You will need them for just about every card you make. Just investing in these three things will improve the quality of your cards and also make the process faster, easier and with less physical strain.
Stamps
If you don’t want to be limited to specialty pattern papers, perhaps the easiest way to create designs and patterns for your handmade cards is stamps. There are a LOT of different stamp designs and designers are coming out with new ones all the time. I recommend clear cling stamps since they are easy to find, use and maintain. Red rubber stamps are very high quality and will hold up over lots of use. If you go with red rubber, I recommend getting the ones with a cling backing instead of wood block.
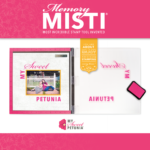
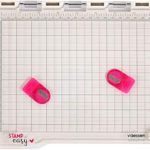
A stamp positioning tool allows you to make multiple impressions in the exact same position. Depending on your tolerance for imperfect impressions and whether you plan to make multiples of the same card design, this could be a must-have for you. For example, if you have a single card design you want to make 50 copies of, you definitely want a stamp positioning tool like the Misti. If you’re a perfectionist and an uneven stamp impression bothers you enough to scrap the paper and start over, definitely get this. It will save you heartache and paper. These tools allow you to hold the paper down (with magnets) and attach your cling stamp to an acrylic door that you can swing down and press onto your paper. Since the paper and the stamp are held in a fixed position, you can make multiple impressions in the exact same spot.
The Misti is expensive (for my budget), so I’m also recommending the Bira Craft model, which is the one I own and use all the time. I’ve never used a Misti, so I don’t know how it compares. I just know the Misti is shown in most YouTube videos on card making, so I think that’s the industry standard.
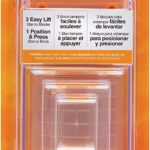
You may also want to consider smaller acrylic blocks for when you’re just stamping a sentiment or something simple. I use the Fiscars set of 4 stamping blocks because they are lightweight and easy to hold. The largest one has feet that allow you to position your card under it before pressing down to make an impression. That comes in handy when you want to line things up just so.
I won’t recommend any specific stamp set because there are so many good ones out there. If you read my post on how to Start Making Handmade Cards, my solution around stamping a sentiment was to buy a gift bag that had appropriate words and cut it out from there. If you haven’t decided to invest in card making, this is a fine one-off solution. However, I highly recommend purchasing sentiment stamps.
You can find a lot of different stamps on Amazon (Lawn Fawn is one of the brands that I see a lot of on Amazon.). Just be aware that Amazon may not have the best selection. I’ve also seen some stamp sets on Amazon that appear to be reproductions of other brand-named stamp sets. Not everything from an unrecognizable brand is a reproduction, though. It’s just something to keep in mind.
Other sites such as Scrapbook.com, SimonSaysStamp.com, FranticStamper.com, etc. have stamps from a variety of designers/producers, so those are great places to shop as well.
Coloring Supplies – Ink, Markers, & Paints
Once you have a stamped image, you have a lot of options for how to color it. I’ll run through some of the ones I use most often and some I often hear about.
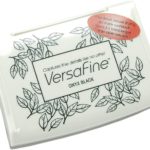
Versafine Black Onyx. I consider this a must-have. It gives you a crisp clear impression. It’s great for sentiments and most of my stamping needs. This is a pigment ink. Although it’s “fast-drying”, pigment inks sit on top of the paper (as opposed to seeping into the paper). As a result, there’s more potential for smudges if you aren’t careful to give it time to dry.
Gina K Obsidian Amalgam Ink. I’ve recently started using this for when I color with alcohol markers. I’ve never seen it on Amazon, so an alternative is the Memento dye ink, which is what I used to use. You don’t want an ink that will react to the alcohol and start feathering.
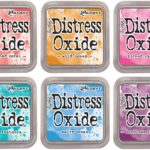
Distress Oxide Inks. For color inks, I use Tim Holtz Distress Oxides the most. They blend beautifully, go on easily and you can get them in small cubes as well as larger ink pads. I recommend starting with a set of small cubes if you don’t know which colors to get. You’ll need an ink stamping tool as well. I like these finger sponge daubers because they are small and easy to store.
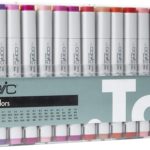
Alcohol Markers. I really like coloring and alcohol markers are fast-drying and blend smoothly as well. You’ll hear many colorists refer to Copic Markers or Spectrum Noirs. I’ll admit, these are both out of my price range. A full set of Copic Sketch markers is over $300. I’ve linked to a smaller set of Copic Ciao markers, which are more affordable but still more than I want to spend on markers.
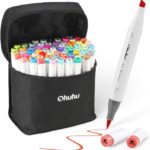
What I use are the Ohuhu brand markers. They offer a set of 48 brush tip alcohol markers, which I find are perfectly fine for my needs (but looking back, I would have gotten the 72). What’s nice is they have a brush tip (similar to Copics) as opposed to the bullet tip you’ll find in many other brands of alcohol markers. There isn’t a huge variety of colors and these can’t be refilled or purchased individually (like Copics) so there are downsides. But because I’m not a professional colorist, these limitations are not a deal breaker. The quality brush tip and blendability of the ink is great. I do own a couple of Copic markers and they are better but I just can’t justify the investment… not yet anyhow.
You can also augment or build up your marker collection slowly. Feel free to mix brands and buy single pens when they go on sale. As long as they are all alcohol based, you can use them with each other.
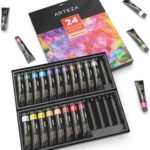
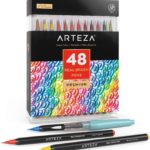
Watercolor. I also dabble in watercolor. I have water-based brush markers because I’m trying to learn brush lettering. I also use gouache paint, which is a highly pigmented watercolor paint. This is an inexpensive medium and it can really be fun to create watercolor backgrounds.
If you plan to use watercolor paint like gouache, you’ll want to use watercolor paper. It’s designed to have a texture that will hold the water. If you just use regular paper, it will not only warp a lot more but the paper fibers may start to pill and come off.
The papercrafting industry is huge and there are a lot of products out there. Hopefully this list of basic handmade card supplies will help you get started! With these basic supplies, your possibilities are endless but your investment in tools, equipment, etc. are still pretty minimal.
In my next post, I’ll go over finishing products that help you add some extra pizzazz to your cards.
DISCLAIMER: This website contains affiliate links, which earn me a small commission at no additional cost to you if you purchase from my link. For more details, check out my Affiliate Disclosure.